
Dynamics 365’s low code tools are great for admins, but don’t always give you the flexibility and power you need.
Python can help you get around this by enabling you to write code that exactly meets your requirements. However, unlike C#, there’s no Dynamics library for Python.
To fix that, I wrote a basic Python utility that handles connecting to Dynamics, so you can then use the Web API to make authenticated actions and interact with your data. I updated it in 2025, to make connecting even simpler.
I’ve already written scripts for many common tasks, like updating data or importing many to many relationships, but the possibilities are endless. In this article, I’ll explain how to use these programs and extend it to meet your needs.
Contents
Why connect with Python
There are lots of reasons to connect to your Dataverse data with Python.
For example, when building a new Microsoft Dynamics 365 solution or using Dataverse with Power Apps, often organisational data needs to be imported into Dataverse. I’ve needed to do this often as part of my work developing a CMS for Femili PNG.
Unfortunately, the available options like Power Query Dataflows and the Edit data in Excel feature have limitations such as not supporting many-to-many relationships and limited support for multiple choice data types.
To overcome the many-to-many import problems, I developed a Python program to connect to Dataverse using the Web API. The complete code is available on GitHub.
Connecting to Dataverse with Python
The primary challenge with using Python to connect with Dataverse is that the existing Python library is no longer maintained, and with the depreciation of ADAL there are limited instructions on how to get the oAuth token needed to authenticate yourself.
To address this, my program uses Azure Active Directory interactive logins and the MSAL library to establish an authenticated session with the Dataverse web API. This session can then be leveraged to execute any of the numerous operations support by the API.
The setup process is quick and straightforward, using user authentication so you can quickly leverage the web api.
Key uses
- Securely accessing all functions of the Dataverse API with an authenticated Python session.
- Downloading Dynamics 365 data using Python for efficient analysis.
- Adding many-to-many relationship data to Dataverse.
- Automating tedious manual processes such as populating option sets and choices.
- Anything you can think of using the Dynamics API and Python!
Quick start guide
If you’re looking to just use your account to authenticate the program follow these steps. If you want to create a dedicated Azure App for the Python program follow the Azure App guide.
Step 1: Fork and clone the Repo
Clone the PyConnectDataverse repository from Github at: https://github.com/YesWeCandrew/PyConnectDataverse
Use pip to install any packages you haven’t installed previously, such as MSAL.
Step 2: Create a new .env file.
Using env.example as a template, create a new .env file. This contains the details on what you’ll use to connect to your Dynamics instance.
You only need to replace the TENANT_ID and the ENVIRONMENT_URI. You can keep the CLIENT_ID as 51f81489-12ee-4a9e-aaae-a2591f45987d unless you want to follow the Azure App instructions below to create your own.
I’d recommend doing this with a test environment first, before using the API on your production environment.
Step 3: Use your favourite IDE to interact with Dataverse with Python
Test the connection by setting the name of your new .env file under parameters in pcd_test_connection.py file.
Run the file to ensure a connection is established. A window will appear, prompting you to log in.
Step 4: Edit and run the Python files
Use and edit any of the modules to execute tasks, or write your own to query the WebAPI. The general process for a file is to:
# Import the utilities that are required
from utils.session_manager import SessionManager
from utils.dynamics_config import get_config

# Specify any parameters, in particular the environment you want to connect to
PathToDotEnv = "env.example"

# Create a config instance to store dot env information
config = get_config(PathToDotEnv)

# Create an authenticated session
manager = SessionManager(config)
session = manager.get_authenticated_session()

# Specify the API Endpoint to connect to, using config.api_base_url
request_uri = f'{config.api_base_url}WhoAmI'
request = session.get(request_uri)
Azure Application Guide
For more security, instead of using the Developer Application ID, you can create your own. If you want to do that, follow these steps:
Step 1: Create a new Azure Active Directory app
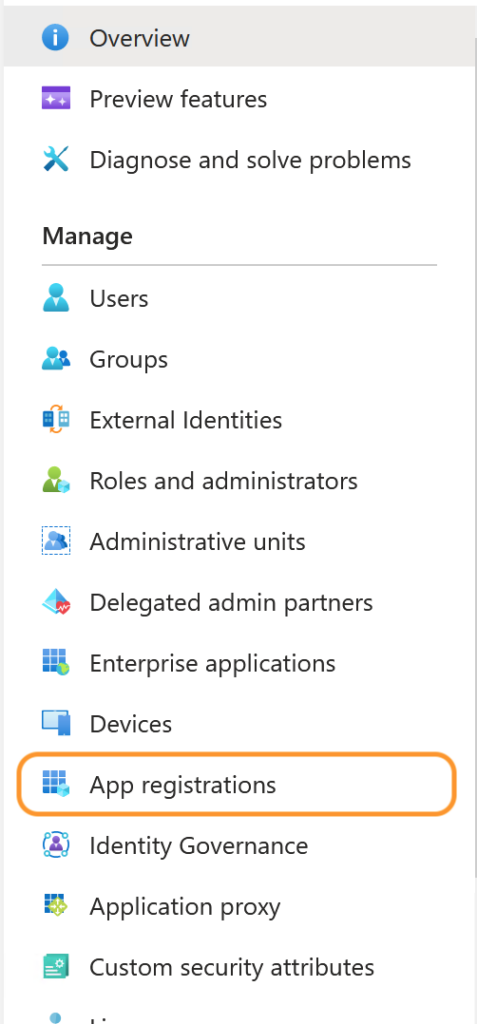
To begin, navigate to the Azure Active Directory portal and create a new app, by clicking Azure Active Directory > App Registrations > + New Registration.
Give your app a name and select the supported account types. In most cases, choosing Accounts in this organizational directory only is recommended. Leave redirect URI blank for now and complete the registration process by clicking Register.

Step 2: Grant app permissions for Dynamics CRM
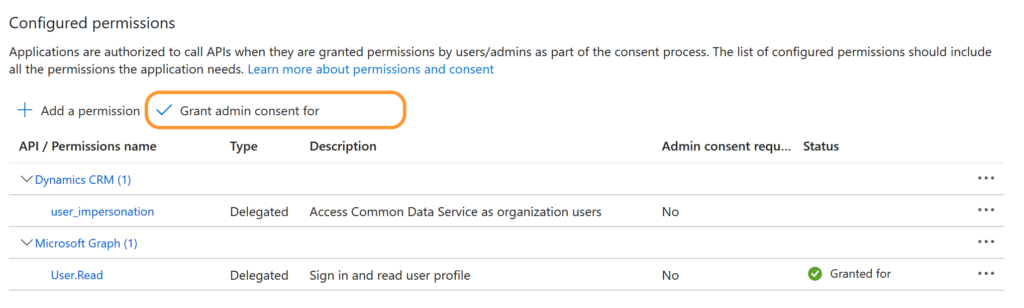
In the sidebar of the newly created app, select API permissions > + Add a permission.
Locate the Dynamics CRM permission and select it, enabling user_impersonation.
Once this permission has been selected, Grant admin consent for your organisation to enable you to interact with the data in Python using the permissions of the logged in user.
Step 3: Configure authentication
To enable interactive MSAL authentication, you need to add a Redirect URI of http://localhost.
To do this, in the sidebar of the app, select Authentication > + Add a platform > Mobile and desktop applications > Add the url http://localhost

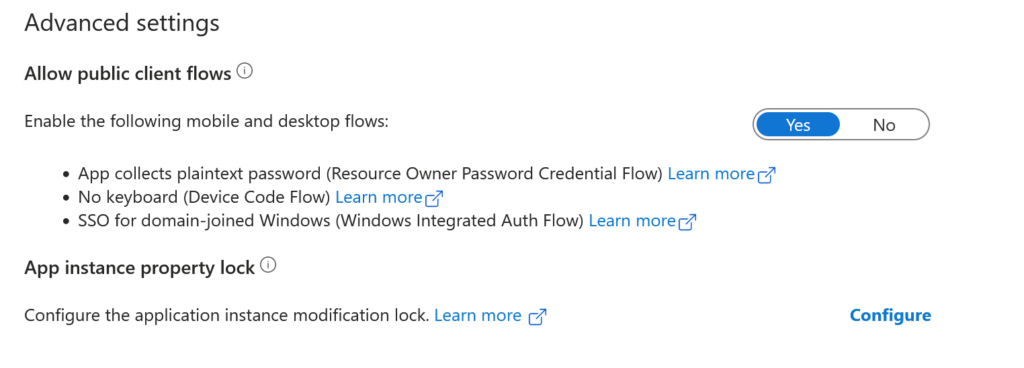
Scroll down to Advanced settings and select Yes to Allow public client flows.
Step 4: Get app information
The app configuration is now complete. In the sidebar, click on Overview in the app sidebar and note the following details:
- Application (client) ID
- Directory (tenant) ID
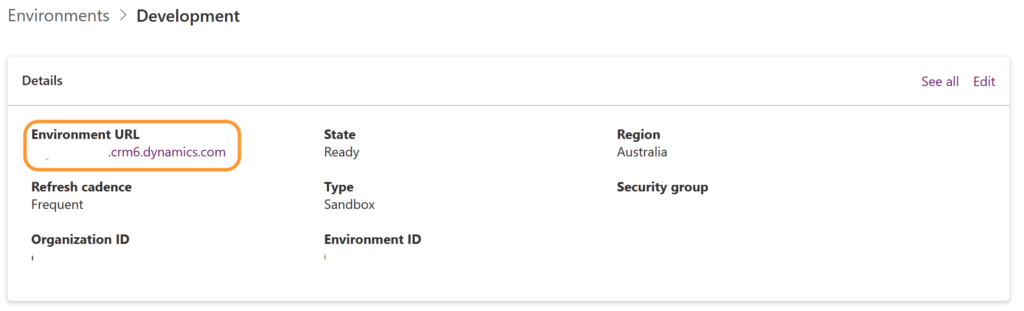
Additionally, retrieve the base URL of your Environment. You can find this in the Power Platform Admin Centre by selecting the environment you want to connect to.
Always use a Development environment for testing, before using the API on your Production environment.
Step 5: Follow the quick start guide above
From now, you can follow the quick start guide instructions above. Just add your new Application ID to the .env file, instead of using the existing one.
PyConnectDataverse
Enjoy the benefits of Python-based interaction with Dataverse! I keep finding new uses for this program and am keen to keep using it to speed up common Dataverse tasks.
As new uses for this program continue to emerge, I encourage you to contribute by forking the repository and submitting pull requests to have your useful functions added. I am open to additions and suggestions to enhance the repository further.